A short introduction to using PlatformIO with CLion for programming an ESP32 MCU outlining some special quirks and tricks to keep in mind.
What you need
- CLion (2020.3 or later)
- PlatformIO Core installed and runnable (e.g. you can run
pio)
See the installation guide for details - PlatformIO Plugin for CLion (Plugins ⟶ Marketplace ⟶ PlatformIO)
Create a project
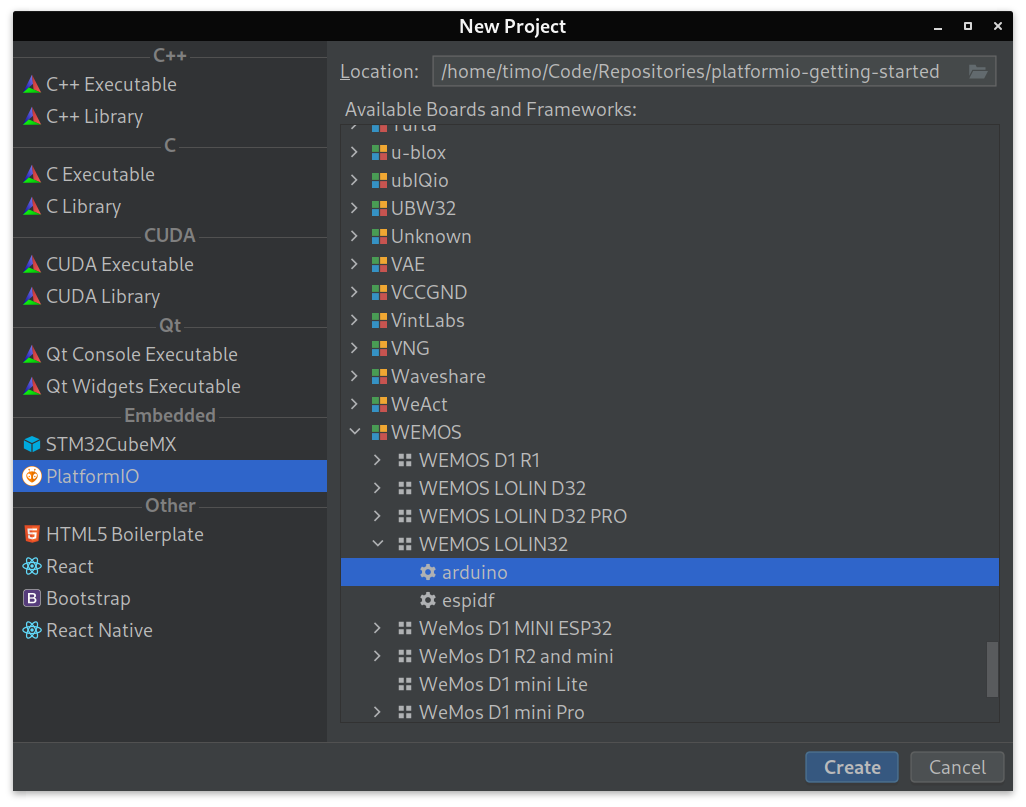
Creating a new PlatformIO project is pretty straightforward. Starting from the CLion welcome screen, click "New Project", select "PlatformIO" on the left and your device and framework on the right. I'm going to use a WEMOS LOLIN32 with the Arduino framework in this guide - you may need to select another model depending on the hardware you are working with.
After CLion is done with project creation, you will be greeted with an empty sketch that you might be familiar with if you've worked with the Arduino IDE in the past:
#include <Arduino.h>

void setup() {
    // write your initialization code here
}

void loop() {
    // write your code here
}
Add some code
Let's add some code. Change your setup and loop methods to output a simple
message every second:
void setup() {
    // "baud rate", transferred symbols per second
    // Must be equal on both sides (e.g. on your PC and your microcontroller)
    //           ↓
    Serial.begin(115200);
}

void loop() {
    Serial.println("I'm alive!");
    delay(1000);
}
Upload & run your project
Of course, we don't want to upload and run our code by executing multiple commands manually, so let's configure CLion to do that for us:
Before creating a new Run Configuration, we need a shell script that
starts monitoring the serial output of our microcontroller. Just save this
as monitor.sh in your project directory. On Windows you should be able to
put the second line into a batch script.
#!/bin/env sh
pio device monitor -b 115200
Now we can create a new Run Configuration by navigating to "Run" ⟶
"Edit Configurations…" and clicking on the plus sign at the top left.
Select  as configuration type, name it "Upload & Run" for example and select
your
as configuration type, name it "Upload & Run" for example and select
your monitor.sh file as the script path.
After that, configure the task to upload the sketch before running our
monitor script by adding a task to the "Before launch" section and selecting
 ⟶
⟶

Make sure you uncheck "Execute in terminal" to make sure CLion stops the serial monitor before uploading your sketch. Uploads will likely fail if the serial monitor is still active while trying to upload the sketch.
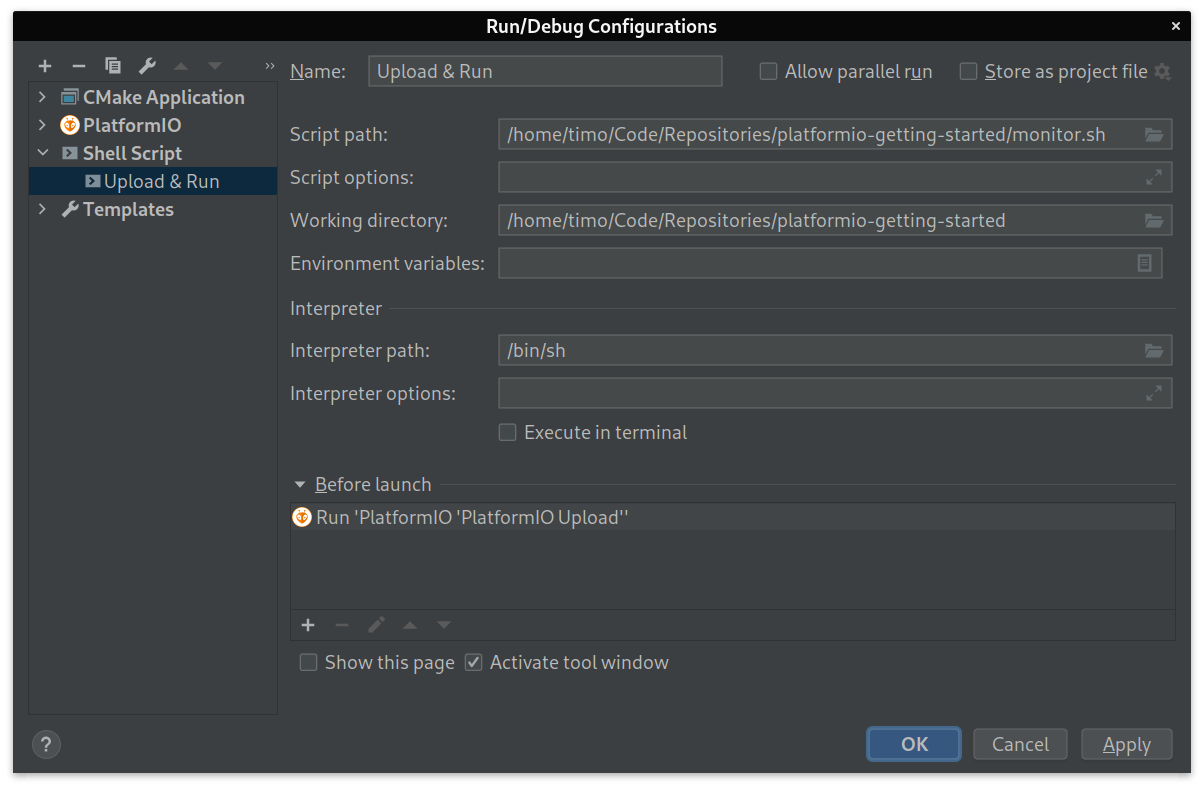
Your final configuration should look like this (of course your paths may vary):
After closing the dialog with
 ,
you should find your run configuration with the
,
you should find your run configuration with the
 button in the toolbar.
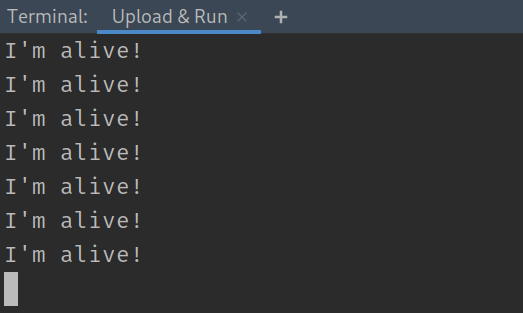
Finally, connect your microcontroller to your machine, hit
and you should start seeing the message after the sketch has been compiled
and uploaded.
Quirks
CLion does not recognize my code after cloning my repository
If CLion does not detect some portions of your code or libraries you
are using after you cloned the project from a Git repository, chances
are high you are missing the CMakeListsPrivate.txt file. This file
is excluded from VCS on purpose and contains platform specific CMake
configuration which is being read by CLion.
Solution: Hit "Tools ⟶ PlatformIO ⟶ Re-Init" and the PlatformIO plugin should regenerate all missing files.
Changelog
- Feb. 12, 2021: Added note to uncheck "Execute in terminal"